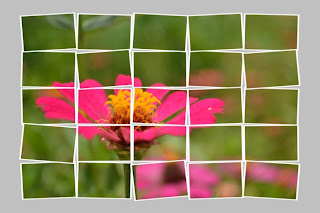
1. Hue/Saturation
2. Filter
3. Polaroid Image
4. Clone Stamp
5. Post Card
6.Out of Bound
7. Book Cover
Really enjoy while having this class, thx to Dr Zaida and all my frez. Wish u all happy and healthy always.
zun3's corner
Tuesday, April 19, 2011
Thursday, March 31, 2011
week 13 : Photoshop Plug- In Filter ( From Internet )
I have found the action which is free from the internet. Just a click " PLAY", we able the create a nice photo and we can easily repeat it on another photo that we like.
Tuesday, March 29, 2011
week 13 : Photoshop Plug- In Filter
We can edit the image by using filter in the Photoshop. There are build in filter or we can purchase/ download other Plug- ins filter from internet to be use in our Photoshop. We can install the plug in or just paste the plug -in in the Photoshop plug in folder.
Plug in Filter - LURE.8BF
Plug in Filter SORTINGTILE.8BF
Week 12 : Action - Black & White
Simple steps to create the Black and White Action
STEP 1:
Click on Window > Action
STEP 2:
At Action Palette click on New Set > New Action > Record
STEP 3:
Click on Image > Adjustment > Black and White (you can choose the mode that you prefer at here. )
STEP 4:
Click on Image again > Adjustment > Brightness/Contrast (this time choose the brightness and contrast that you prefer)
STEP 5:
Activate “Set 1” in action palette > save action > stop recording
By just click on the “PLAY” icon in the Action palette we can simply change the colour images to black and white image at the brightness/contrast that we are preferred without repeat every step from the beginning until end.
Sunday, March 27, 2011
Week 12 : Case Study 3 - The Horrible DPI Mistake
Here's the scenario - a print shop/graphics designer/magazine asks a client for a photo at 300 dpi. They wish to print it out 7" x 5". The client already has a beautiful digital photo with pixel dimension of 2048 x 1536. The client notices that the photo editing software is showing that the photo is set to 72 dpi. So, following orders, the client types in 300 to reset the dpi to 300. In doing so the image is resampled and is enlarged over 4 times to pixel dimensions of 8533 x 6400. The client sends this enlarged 300 dpi photo. The print shop/graphics designer/magazine rejects it (too grainy, too colour blotched). The client is crushed.
The sad thing is that the client already had the perfect photo (2048 x 1536 @ 72 dpi) which would have been beautifully printed at 7" x 5" ( at 292.6 PPI). The print shop / graphics designer /magazine didn't know what they really wanted. - READ WHAT PRINT SHOP REALLY WANT and the client didn't know how to change the DPI without resizing the image to give the print shop what they mistakenly think they need - READ HOW TO CHANGE THE DPI.
The sad thing is that the client already had the perfect photo (2048 x 1536 @ 72 dpi) which would have been beautifully printed at 7" x 5" ( at 292.6 PPI). The print shop / graphics designer /magazine didn't know what they really wanted. - READ WHAT PRINT SHOP REALLY WANT and the client didn't know how to change the DPI without resizing the image to give the print shop what they mistakenly think they need - READ HOW TO CHANGE THE DPI.
ANALYZE THE ABOVE PROBLEM. PREPARE YOUR REPORT IN YOUR BLOG ON UNDERSTANDING WHAT IS DPI?
DPI
- Dots per inch
- Is one of the measurement of resolution
- Measure of how a image is printed to the medium such as paper.
- The more dots in one inch/cm , the larger the size of graphic file
- The more dots in one inch/cm the clearer the picture.
- Picture A with 300 DPI and picture B with 600 DPI. Both will look the same if printed with 300 DPI laser printer. BUT there are significant different if printed by 600 DPI. Picture B is clearer than picture A.
- Picture C with 72 DPI. There are not different between Picture A and Picture C while display in computer screen. BUT There are significant different when printed out. A computer monitor only able to display 72 dots or 92 dots of picture information in an inch.
- DPI doesn’t effect the quality of image.
Client | Print Shop |
Client was assumed that DPI is dots per inch. | Print shop was assumed that DPI is PPI (digital pixels per inch). |
DPI is number of dots in one inch or a resolution of a printed image. | PPI is the number of pixels in one inch. |
Client should change the DPI of the image by DESELECT “resample image” in Photoshop. So that the pixels of image remain unchanged. | Printing shop should ask for the pixels in the preferred format instead of DPI from the client. |
By resampled the image become 300 DPI, pixel dimension of 8533 x 6400 is not suitable to print out as 7” x 5” . Due to the formula: 8533 pixel / 7" = 1219 PPI 1219 PPI is too grainy, too colour blotched for the image with 7” x 5” | A photo with 72 DPI, pixel dimension of 2048 x 1536 is suitable to print out as 7” x 5” . Due to the formula: 2048 pixels / 7" = 292.6 PPI |
Wednesday, March 9, 2011
Subscribe to:
Posts (Atom)


